| In a lot of the recipes I've written about on this site, I've often made reference to my dad's homemade cheeses. I was lucky enough this past weekend to watch him make some homemade Ricotta and Parmesan (and of course went home with a bunch!) It's actually not a difficult process...but it is very time consuming. There's also a bit of technique and art to the whole process. It was fun to hear my dad keep saying "you just...when you've done it for many years, you just know when it's ready." I guess it will be a while before I ever get to that point. But for now, I'll just enjoy watching my dad do his thing, and enjoying the fruits of his labour. Or, I guess I should say the cheese of his labour. Click the title of this post or the "read more" link to see how it all came together. |  |
The thing I like most about my dad's homemade cheese is that it's made from the freshest, purest, unpasteurized milk, and that's it. Well, that and a little liquid rennet to get the milk to separate into solid curds. He gets his milk from a local Mennonite family. He pays $30 for 40 Litres, with which he is able to make 2 big wheels of Parmesan, 2 huge provolone balls, and 2 large baskets of ricotta. If I were to try and buy the amount of cheese he makes in the grocery store, I'd pay way more! He gets a pretty amazing deal.
It usually takes my dad a whole weekend to make his cheese, because he makes so much all at once. Most of that time is spent waiting for the milk to curdle, form, dry out, and cure. He starts by making Parmesan, and then the left over liquid (which is called whey) is used to make the Ricotta. For this post, I will show you how he makes his Parmesan, and the next post will be all about Ricotta.
It usually takes my dad a whole weekend to make his cheese, because he makes so much all at once. Most of that time is spent waiting for the milk to curdle, form, dry out, and cure. He starts by making Parmesan, and then the left over liquid (which is called whey) is used to make the Ricotta. For this post, I will show you how he makes his Parmesan, and the next post will be all about Ricotta.
My Dad's Homemade Parmesan:
**This amount could make 4 large wheels of Parmesan, but my dad only made 2 out of it and retained the rest of the liquid to make Ricotta and Provolone cheeses as well.**
Ingredients:
Other Materials:
Directions:
**This amount could make 4 large wheels of Parmesan, but my dad only made 2 out of it and retained the rest of the liquid to make Ricotta and Provolone cheeses as well.**
Ingredients:
- 40 Litres of unpasteurized, fresh milk (see above note)
- 2 tbsp liquid rennet
- Coarse sea salt
Other Materials:
- 2 large stock pots (large enough to hold all the milk)
- a fine mesh sieve, or cheese cloth
- Large pail
- Mesh forming baskets
- cooking thermometer
- Long mixing spoon, paddle, and whisk
Directions:
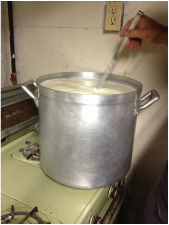 Heat milk over the stove until temperature reaches about 95 degrees F. While it is heating, slowly stir to ensure that the milk at the bottom of the pot doesn't burn. 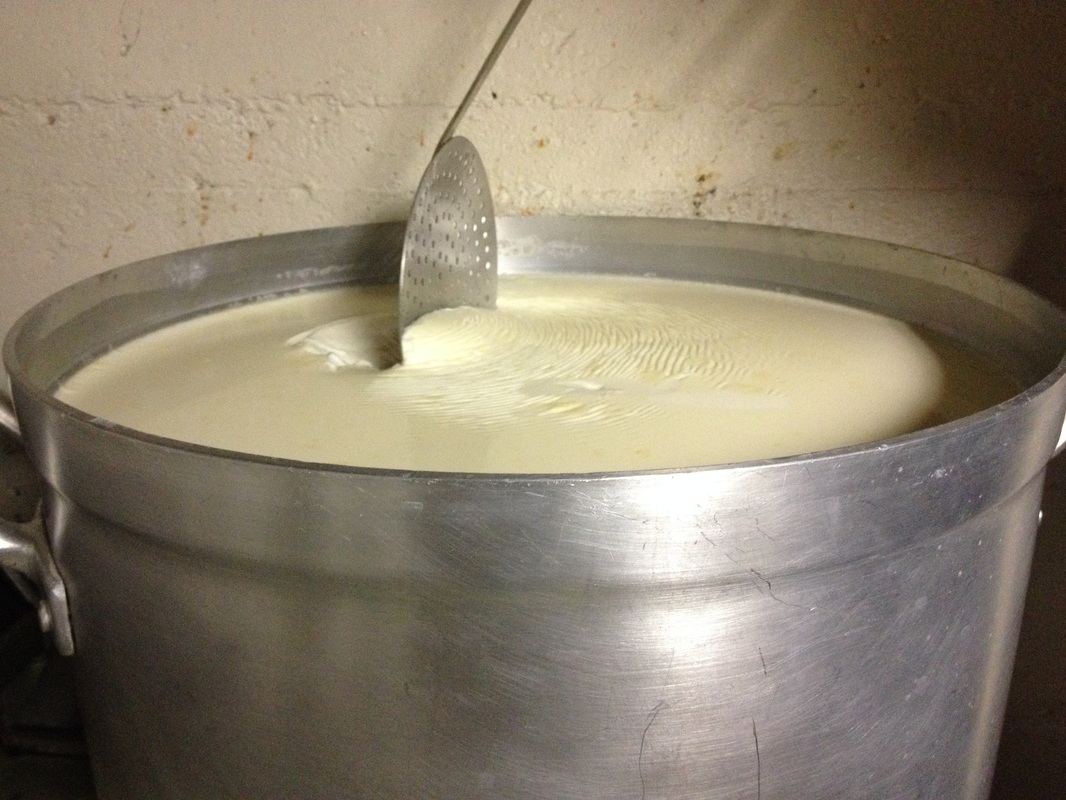 Slowly start to break up the solid with a long slotted spoon. 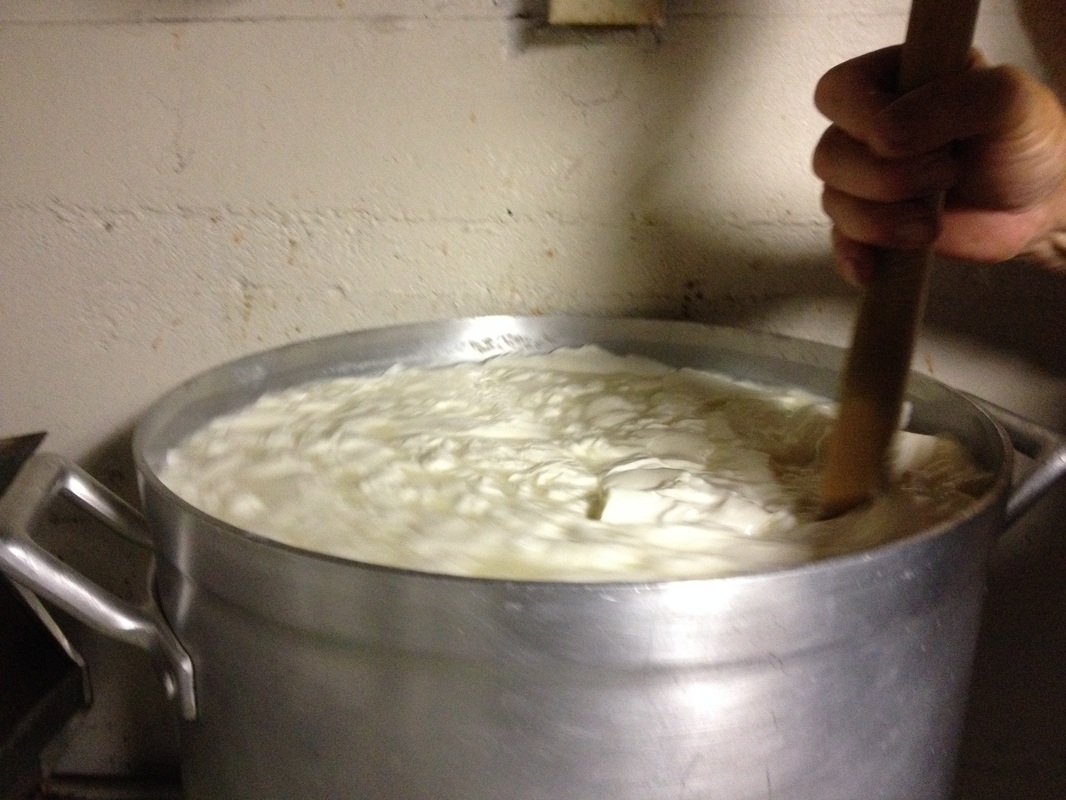 A wooden mallet may also work. 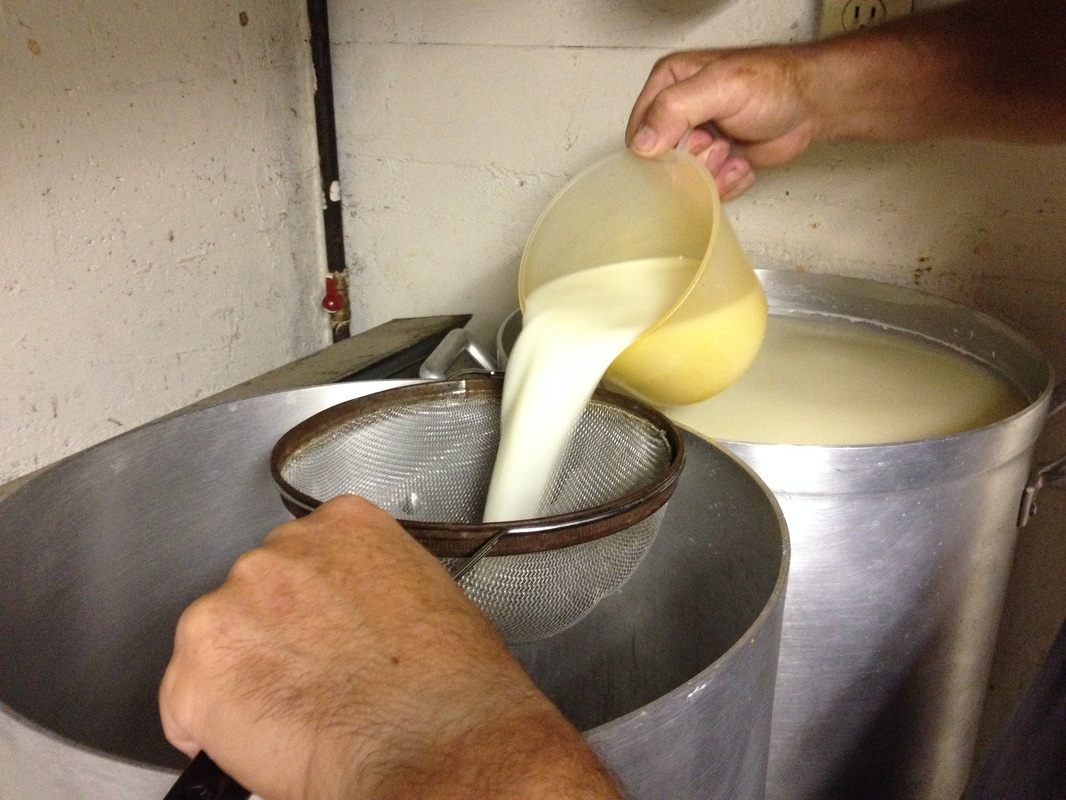 Have another large pot or pail ready with wire sieve or cheese cloth over the top. Slowly pour the liquid into the sieve. 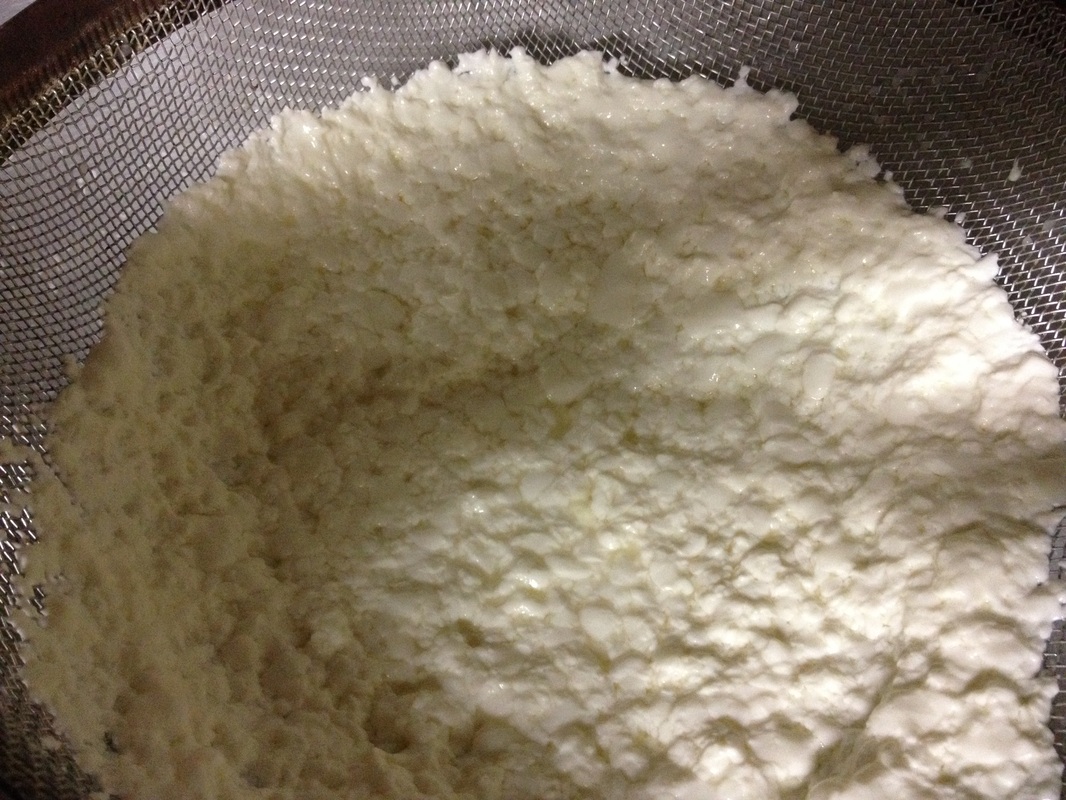 Fresh Parmesan! 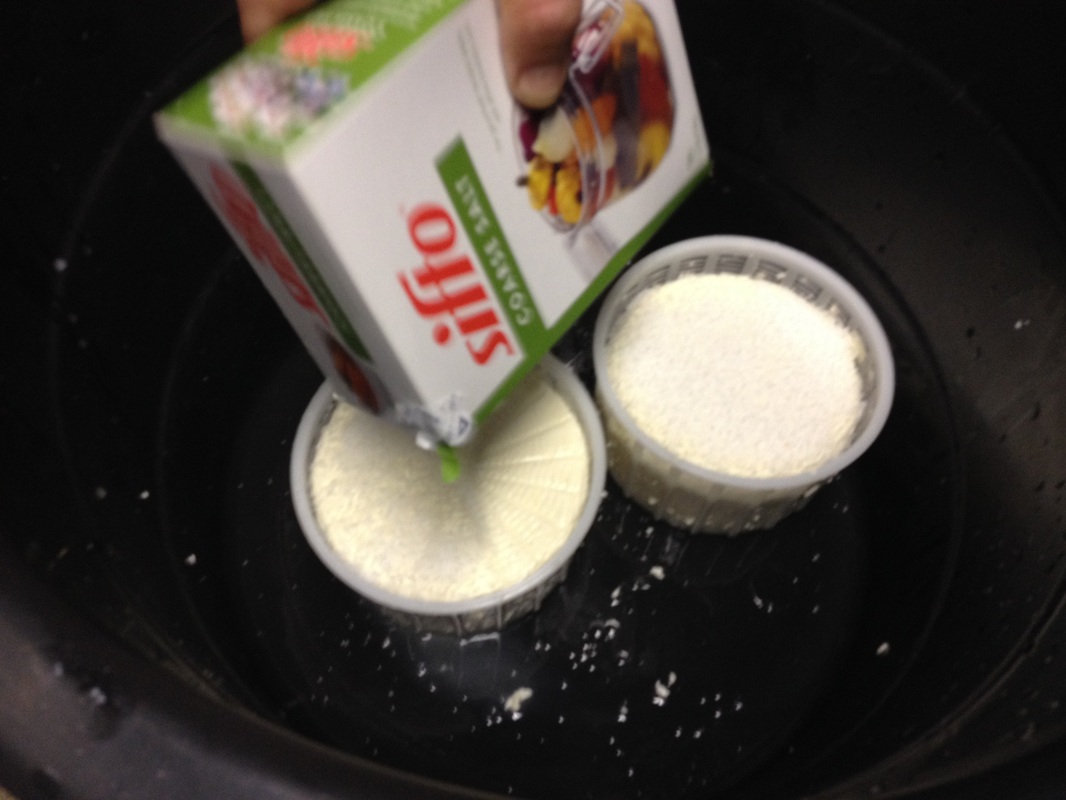 Pour a generous amount of course sea salt over the top of the form. Take out, turn over, press back into the form and cover with salt again. | 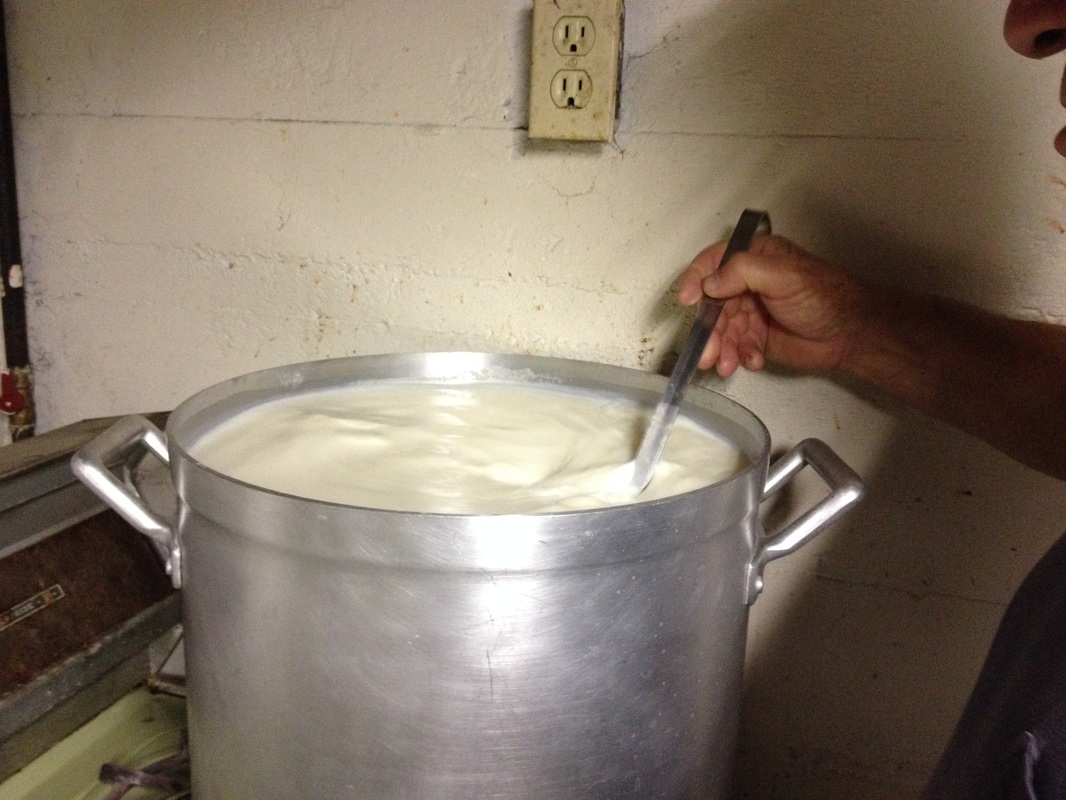 When milk has reached 95 degrees F., add 2 tbsp of rennet and take off heat. Let sit for approx one hour. 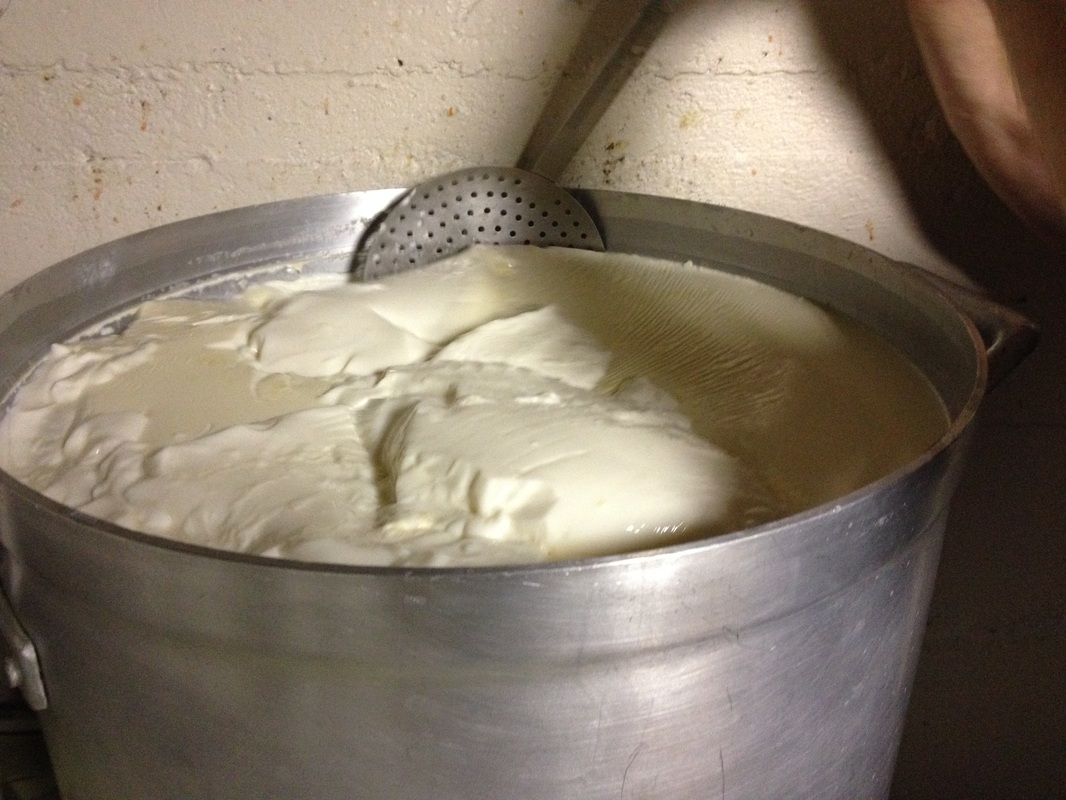 Work very slowly, and make sure you scrape down the sides of the pot. 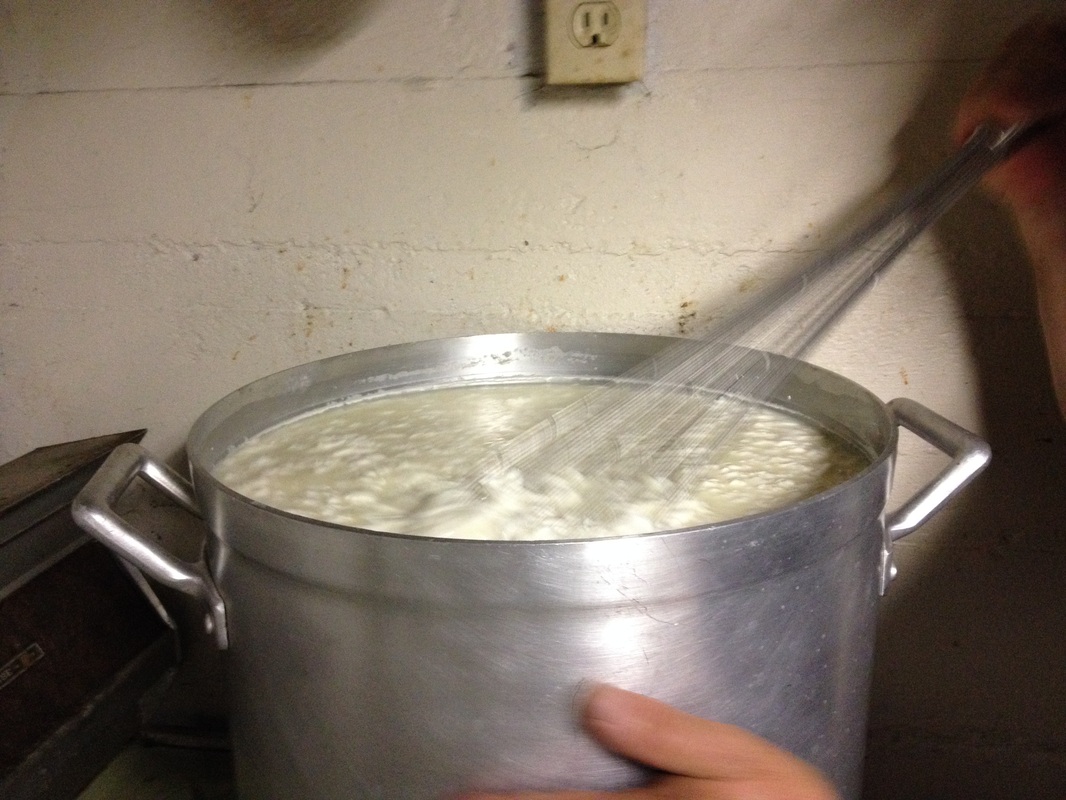 Or a long wire whisk. Keep mixing until the solid has been broken up into small curdles.  The curdles will collect in the sieve while the liquid pours into the pot below. 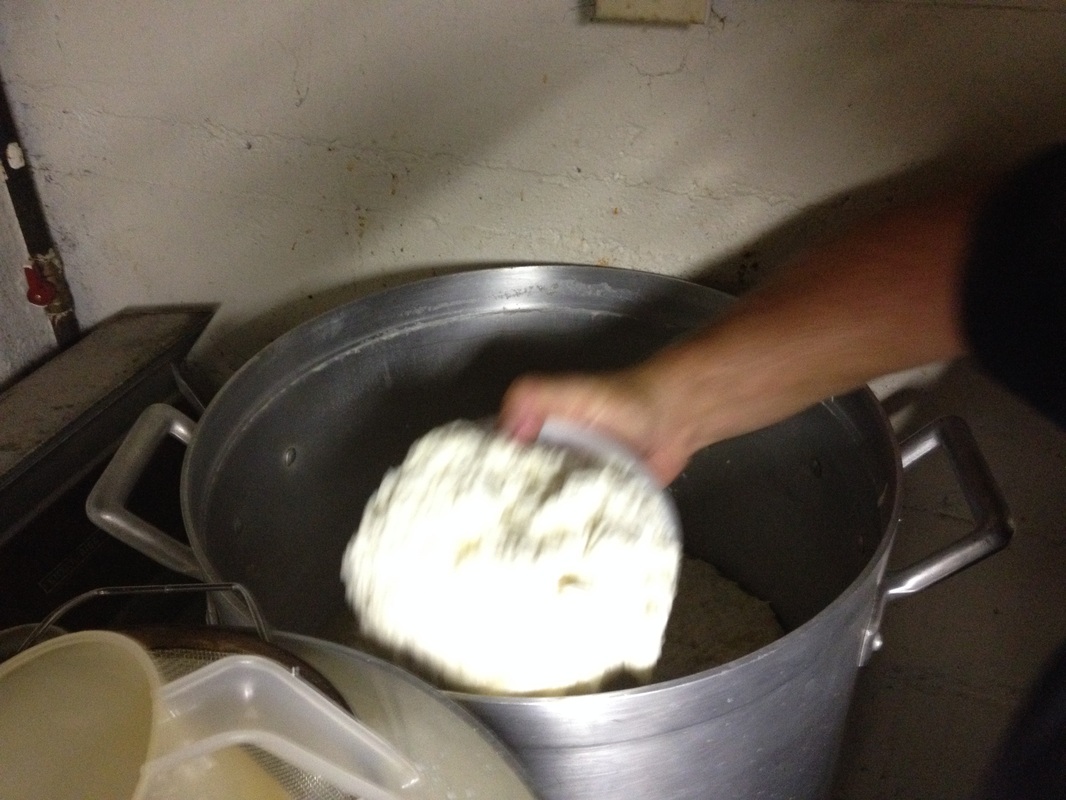 Scoop the Parmesan cheese solids into a forming basket. 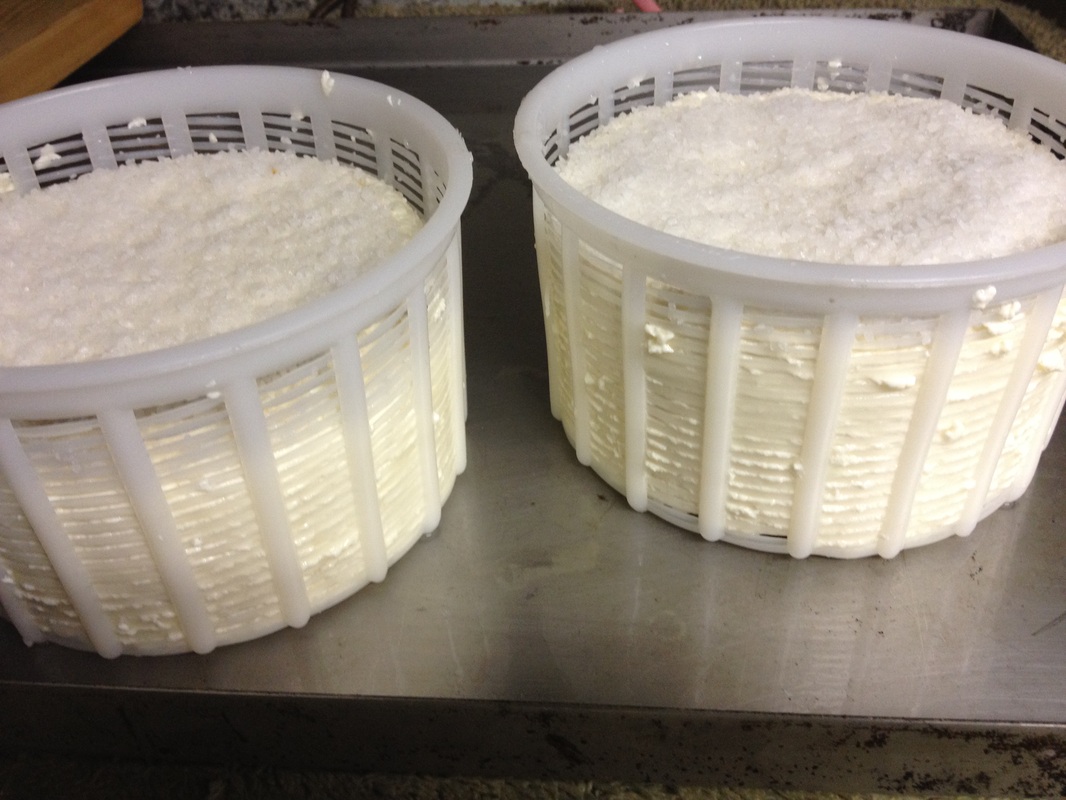 Leave the forms to dry in a cool, dark place. The salt will cure the cheese as it dries out, and give that salty flavour that Parmesan cheese is known for. | 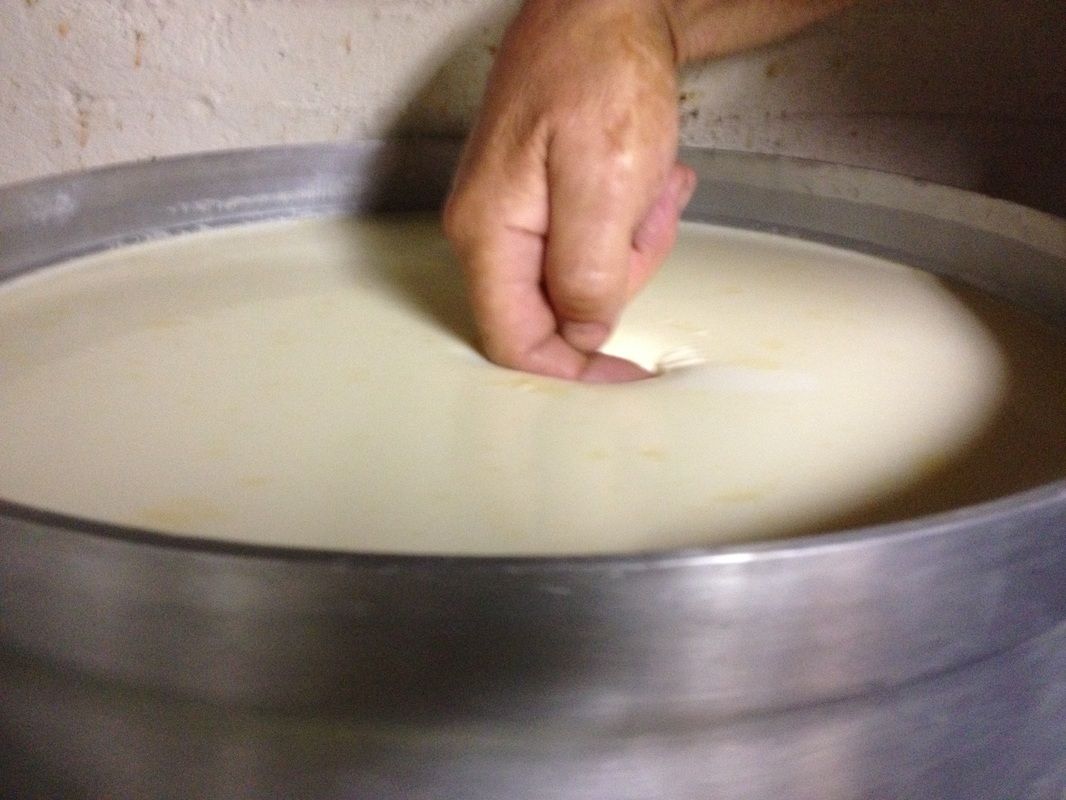 Milk will be ready when you lightly press finger on top, and it is solid. 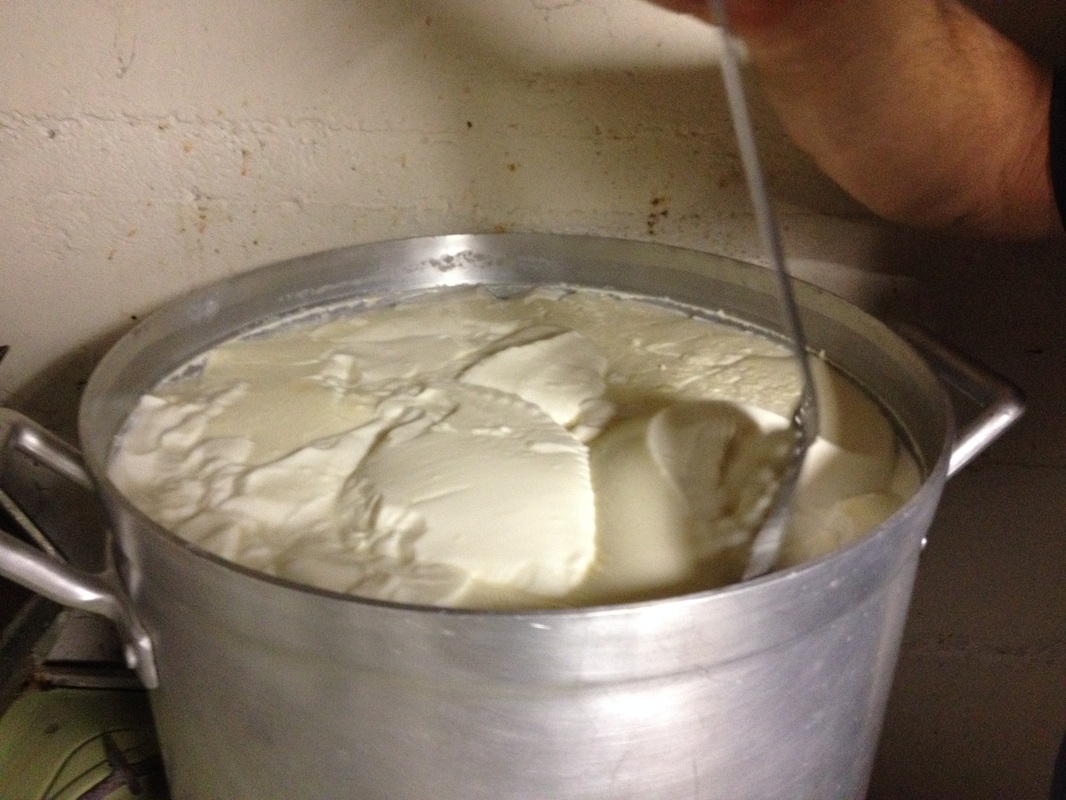 As the solid starts to break up, it will become runny again. 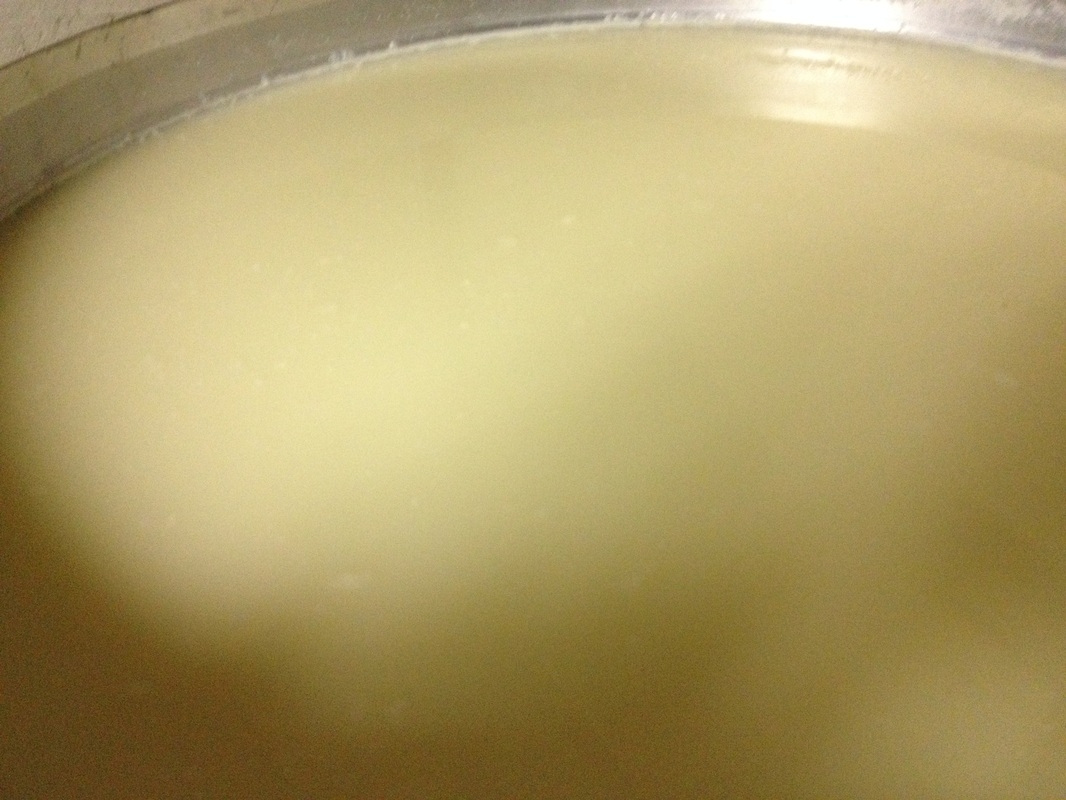 After mixing, the curdles will settle toward the bottom of the pot while the liquid rises to the top. 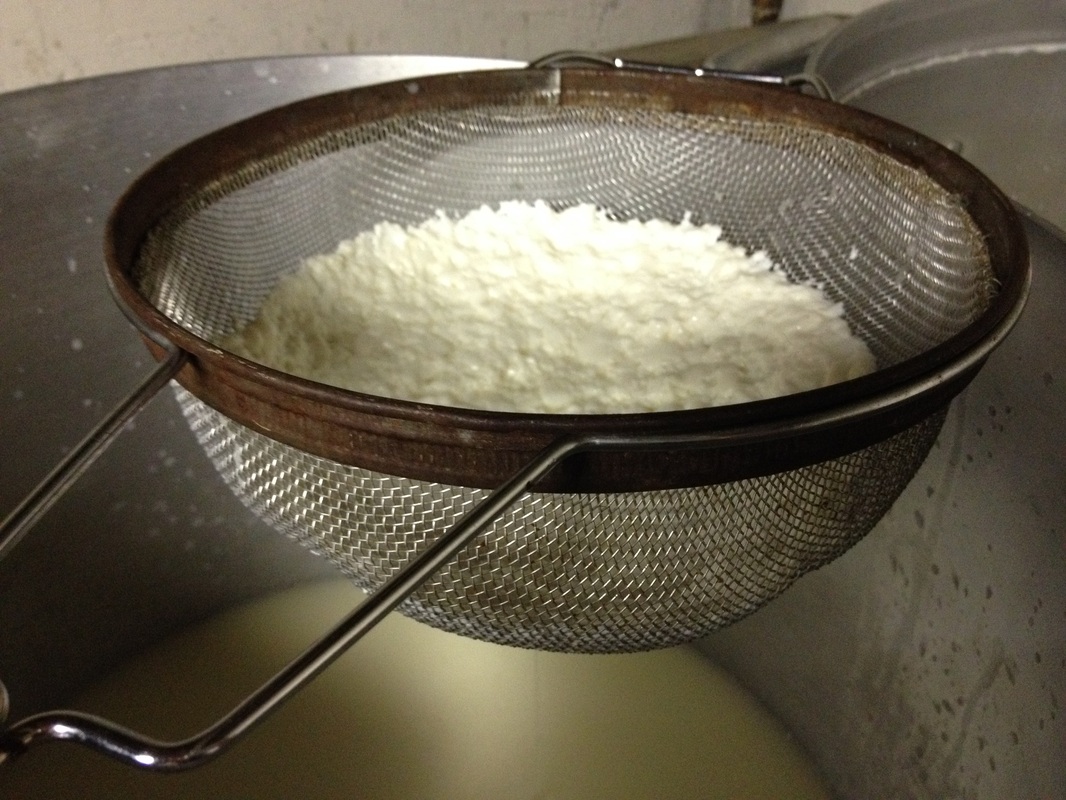 Continue to let the liquid drip out until only solids are left in the sieve. 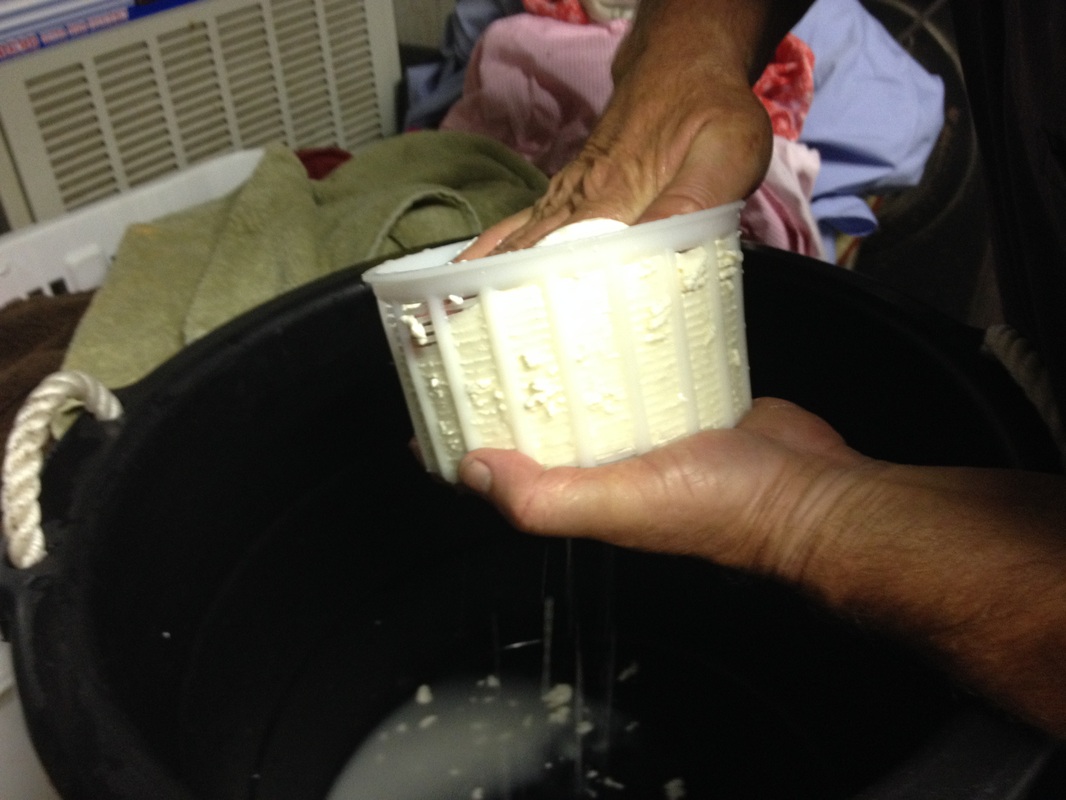 Press firmly to squeeze out any excess liquid. You may need to take out a few times and turn over, then press back into the form. Continue until most of the liquid is out. 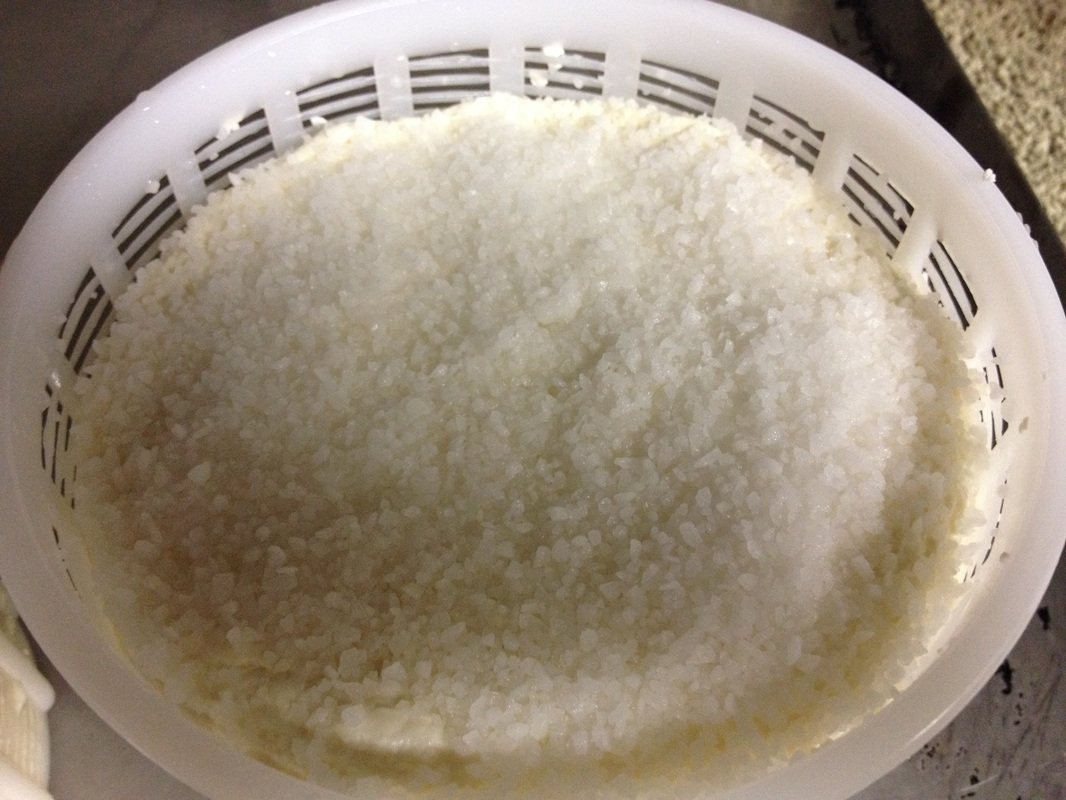 In about a week, Parmesan will be ready to slice and eat. If you want to grate it, you will need to let it cure and dry out even longer, about a month. |


 RSS Feed

